Thursday, March 3, 2022

SMTP server on Windows: setting up and installation

 SMTP server on Windows: setting up and installation.

This guide will cover the process of installing and configuring an smtp server on virual servers running Windows operating systems.

What it is

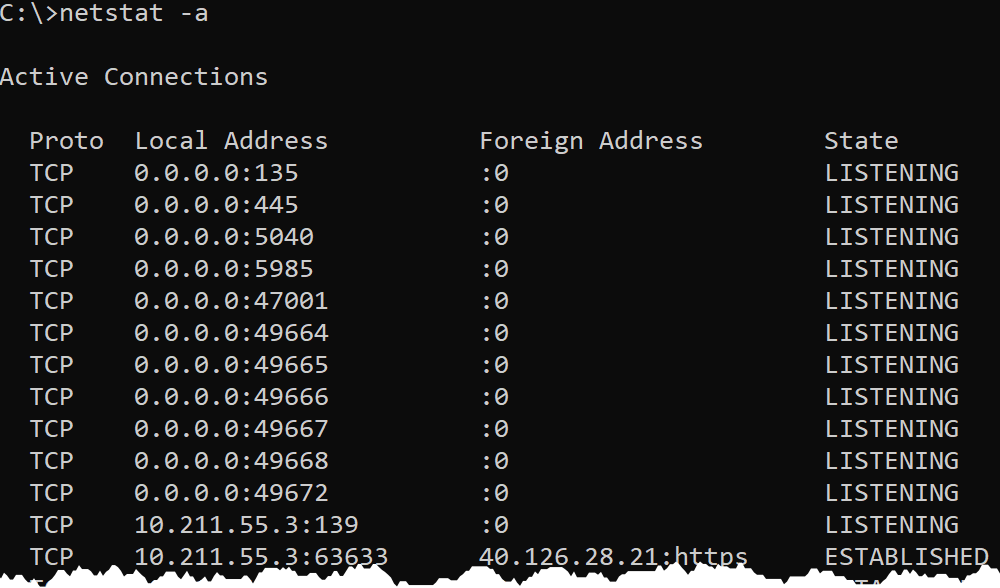
An SMTP server is used to send e-mail for exchange on the Internet and within a local network. Can be used to send system messages and log files.

Installation

First you need to add the missing features.

SMTP Server--add roles-begin.png

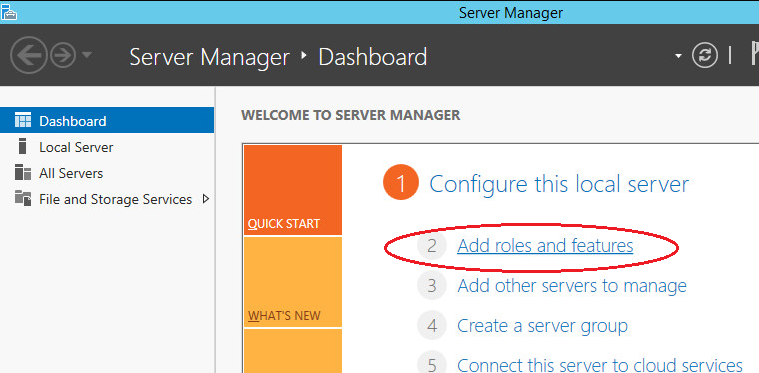
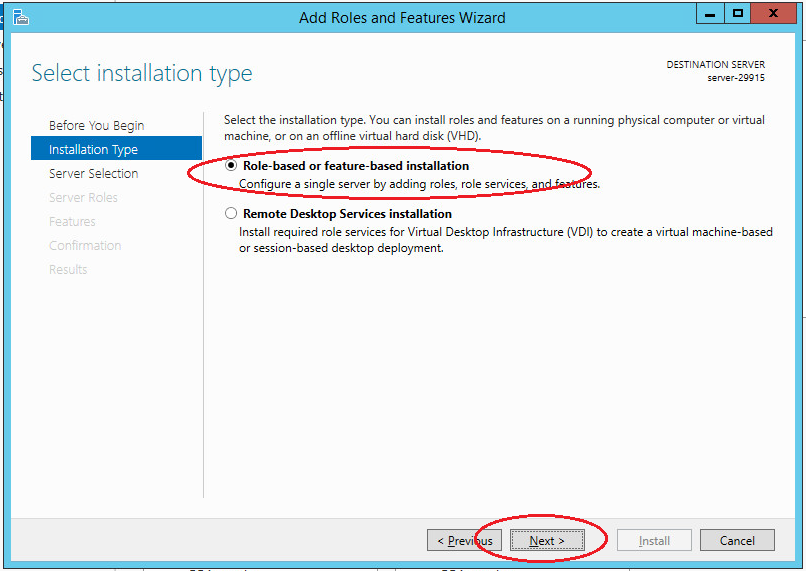
Select “Role-based or feature-based installation” and click “Next”.

SMTP Server--add roles-role-based select.png

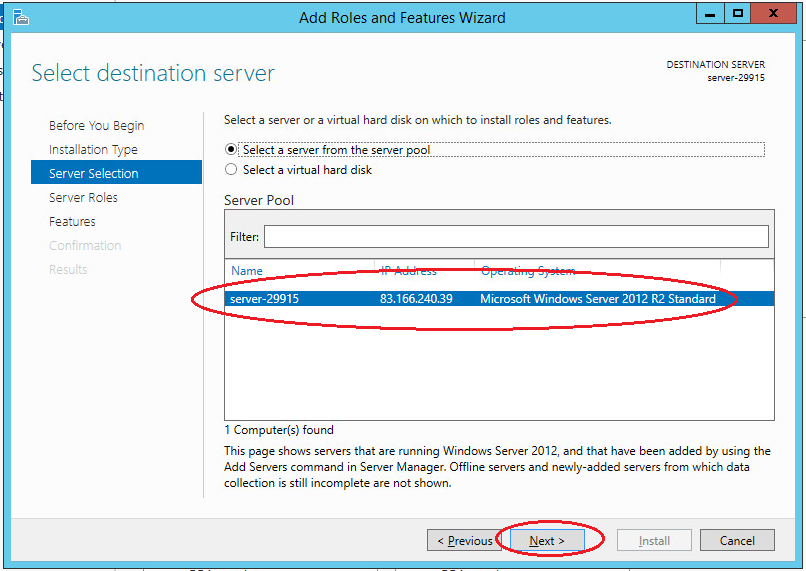
Choose needed server from the pool.

SMTP Server--add roles-role-choose server.png

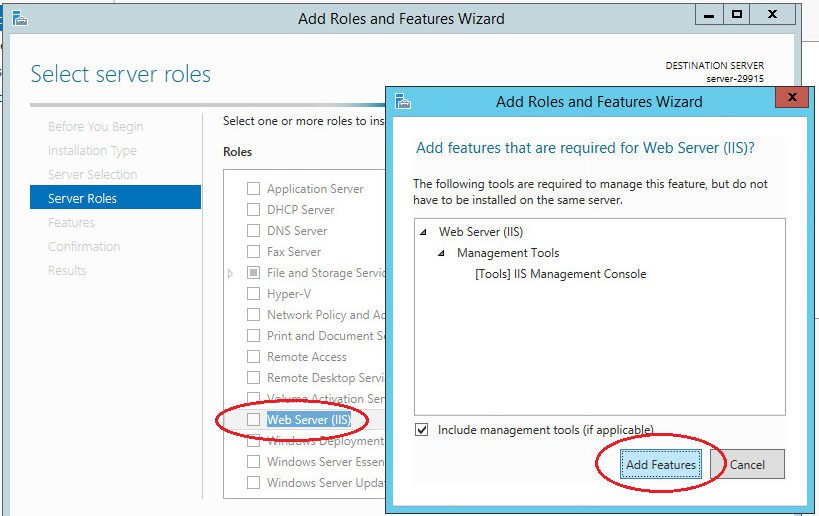
In the next step, select the “Web Server (IIS)” role. In the window that opens, click “Add features”. Web server (IIS) contains consoles to manage the SMTP service.

SMTP Server--add roles-add IIS.png

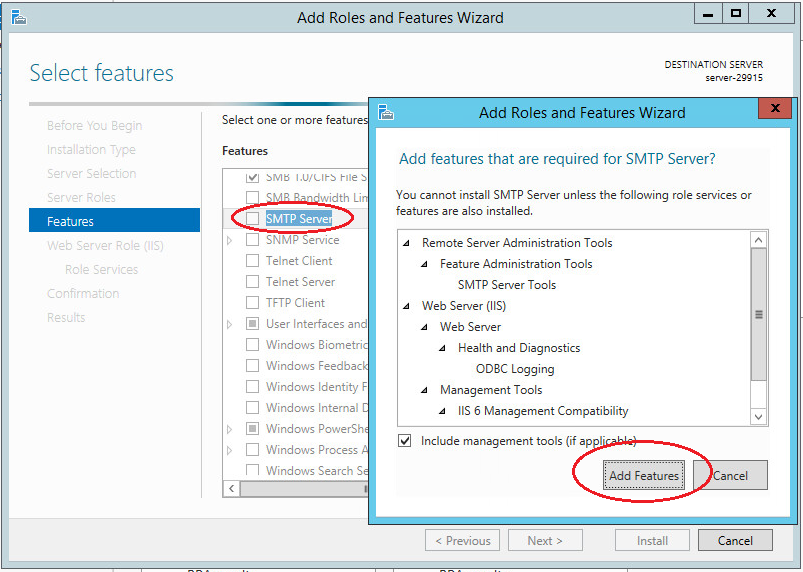
Next in the list of features, select “SMTP-server”. In the window that opens, click “Add features”.

SMTP Server--add roles-add SMTP.png

In the following steps, accept the default settings and complete the installation. Server reboot is not required.

SMTP server setup

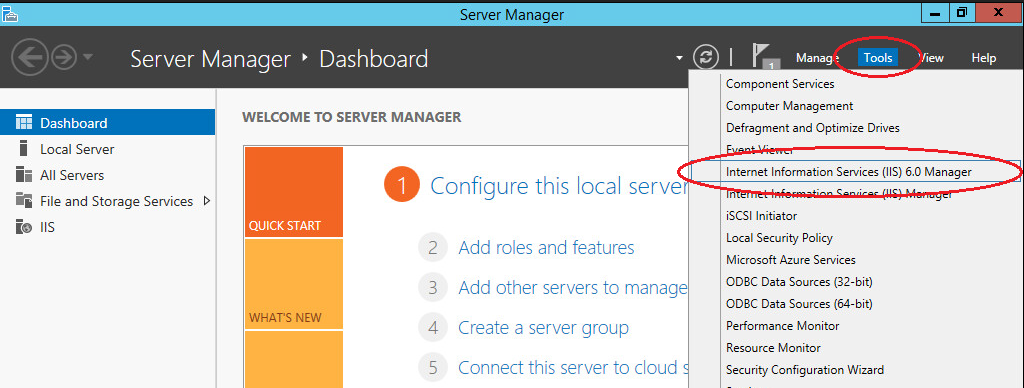
You can manage your SMTP server through Internet Information Services (IIS) Manager 6. To open IIS, go to Server Manager and in the menu in the upper right corner select “Tools” -> “IIS 6.0 Manager”.

SMTP Server--add roles- IIS manager.png

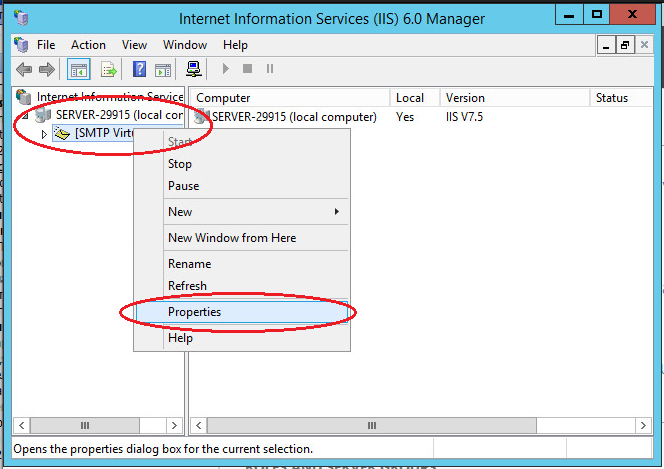
Expand the branch with the server name, select SMTP Virtual Server and open its properties.

SMTP Server--add roles- IIS manager properties.png

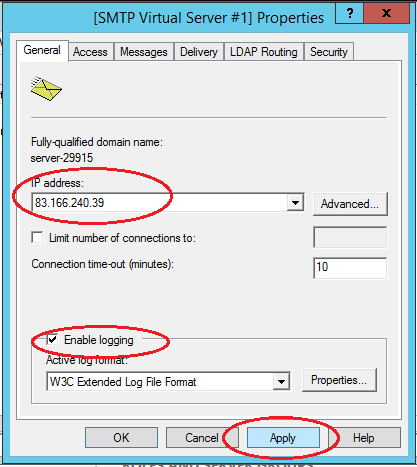
On the “General” tab, select your IP address on which the SMTP server should respond and enable logging to save information about all sent emails.

SMTP Server--add roles- IIS manager properties-general.png

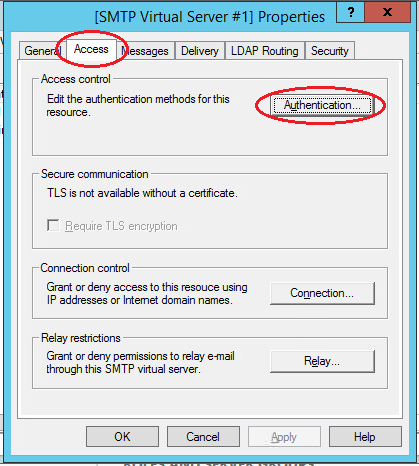
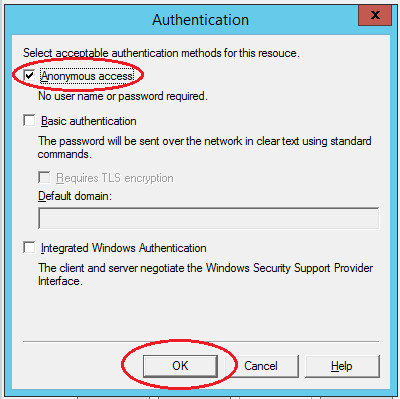
On the “Access” tab in the “Access Control” section, click the “Authentication” button. In the window that opens, check the box “Anonymous access” so that all users of the server and applications can use the SMTP server.

SMTP Server--add roles- IIS manager properties-Access.png

SMTP Server--add roles- IIS manager properties-Anonymous Access.png

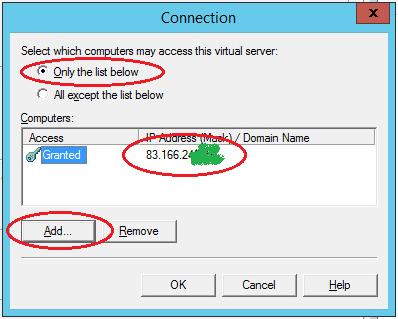
Next in the “Connection Control” section, click the “Connection” button. In the window that opens, allow access to the SMTP server to only certain computers by adding them to the list and selecting the connection type “Only computers from the list below”.

Note: do not forget to add the IP address of the server on which the SMTP server is configured.

SMTP Server--add roles- IIS manager properties-connection control.png

SMTP Server--add roles- IIS manager properties-connection srver ip.png

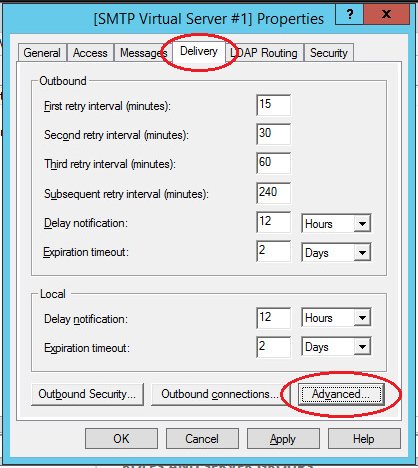
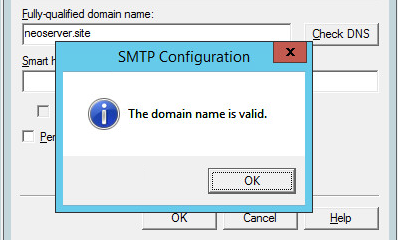
Next, on the “Delivery” tab, click the “Advanced” button. In the window that opens, in the “Fully Qualified Domain Name” field, enter your domain name or IP address.

SMTP Server--add roles- IIS manager properties-connection server delivery.png

SMTP Server--add roles- IIS manager properties-connection server name_0.png

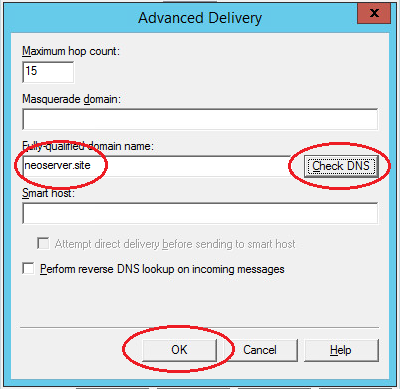
When checking DNS, the domain name must be valid.

SMTP Server--add roles- IIS manager properties-connection server name-1.png

Save all made changes.

SMTPSVC autorun service

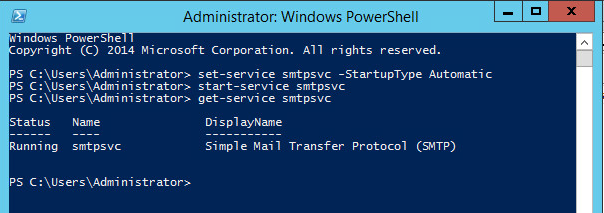
The SMTP server service should start automatically when the server is turned on. To do this, open a command bar and run the following commands:

Start the service;

Verify that the SMTPSVC service is running:

SMTP SVC autorun service.png

SMTP server testing

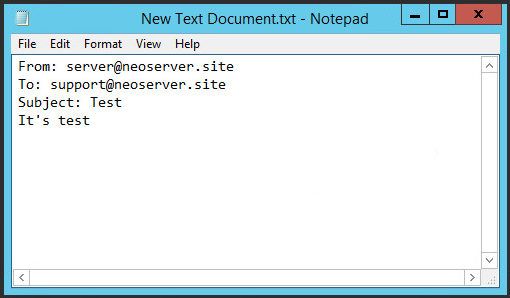
To check the correctness of the work, create any text document with the txt extension (for example, on the desktop), and enter the following lines, specifying from whom you are sending the letter and to whom:

SMTP Server--test.png

Notes:

  • in the mailing address of the sender, specify your domain or ip-address as the domain name, the mailbox name can be any;
  • Sent emails get spammed; to prevent this from happening you need to configure SPF and / or DKIM for your domain.

Next, transfer the created file to the C: \ inetpub \ mailroot \ Pickup directory. The file will disappear after a short time. Check the received email.

Wednesday, February 2, 2022

How to Find Listening Ports with Netstat and PowerShell and Kill process in window


Using Netstat to Find Active and Listening Ports

Netstat is one of those command-line utilities that seems like it’s been around forever. It’s been a reliable command-line utility to inspect local network connections for a long time. Let’s check out how to use it to find listening and established network connections.

Netstat has many different parameters. This tutorial will only use three of them. To learn more about what netstat can do, run netstat /?.

Assuming you’re on a Windows PC:

1. Open up an elevated command prompt (cmd.exe).

2. Run netstat -a to find all of the listening and established connections on the PC. By default, netstat only returns listening ports. Using the -a parameter tells netstat to return listening and established connections.

Run the Netstat -a
Run the Netstat -a

The output above is broken out into four columns:

  • Proto – shows either UDP or TCP to indicate the type of protocol used.
  • Local Address – shows the local IP address and port that is listening. For many services, this will be 0.0.0.0 for the IP part, meaning it is listening on all network interfaces. In some cases, a service will only listen on a single Network Interface (NIC). In that case, netstat will show the IP address of the NIC. A colon separates the IP address from the port that it is listening on.
  • Foreign Address – shows the remote IP address the local connection is communicating with. If the Foreign Address is 0.0.0.0:0, the connection is listening for all IPs and all ports. For established connections, the IP of the client machine will be shown.
  • State – shows the state the port is in, usually this will be LISTENING or ESTABLISHED.

3. Now run netstat -an. You should now see that any names in the output have been turned into IP addresses. By default, netstat attempts to resolve many IP addresses to names.

run netstat -an
run netstat -an

4. Finally, perhaps you’d like to know the Windows processes that are listening or have these connections open. To find that, use the -b switch.

Using the -b switch requires an elevated command prompt or PowerShell prompt. You will get the error The requested operation requires elevation if you use the -b switch in a non-elevated prompt.

netstat -anb
netstat -anb


How to kill port 443 in windows

 
netstat -ano | findstr :443
taskkill /PID <yourid> /F

 Ref: https://adamtheautomator.com/netstat-port/

          https://www.codegrepper.com/code-examples/shell/how+to+kill+port+443+in+windows